Silhouette PixScan
As most people who own a Silhouette Cameo or Portrait already know, Silhouette America just came out with a new addition to their versatile cutting systems: the PixScan.
Honestly I’m surprised that this iconic machine didn’t come pre-built with the PixScan technology. But being the crowd-following individual I sadly am, I never questioned why it never existed even though I have, countless times over, tossed an idea in the trash because this technology wasn’t available in my moment of need. Therefore I am experiencing that sensation when you discover a new paper pad or Martha punch and you feel and overwhelming urge to just have that item in your possession. Yes, this is exactly how I feel about the PixScan mat.
So you might be wondering…what has gotten this crazy girl all obsessive about?
Well there are plenty of resources out there such as this fine blog which outlines the basic requirements for a Silhouette user (or non-Silhouette user if you so unfortunately happen to be one). Or check out the video from the Silhouette America website:

In short, it’s a sticky PixScan mat with registration marks already on it, you put your desired material/picture on it and then take a photo or scan it. Transfer the image file to your computer and import the image using the Silhouette studio 3.1 or higher software. The Software automatically detects the registration marks and makes a virtual flattened image of your picture (adjusting for angles, lopsidedness, overall shaky photography skills) at which point you can then proceed to create masks, outlines, shapes of every size, etc. etc. etc. to cut out of your material already tacked on to the PixScan mat. Just don’t readjust your picture or you’ll have to start all over again…
So why I’m excited about it…but first a little background on my experiences with cutting images out of paper…
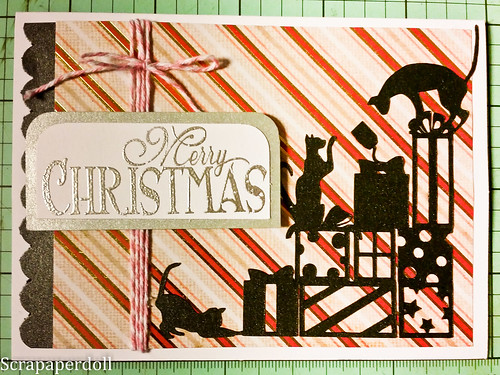
It takes me forever to fussy cut a stamped image and I have never been able to master the detailed precision cutting that only my cameo could manage. And being the perfectionist I am, it is often frustrating when I can’t achieve the perfect cut of nice image from pretty printed papers. I always envied the crafty ladies who could cut such beautiful figures from their G45 papers or delicate flowers and whimsical animals off of a thin magazine page.
I remember one time when I was making a birthday card for my BFF and I had stamped a Tim Holtz’s stamp of a bird…I spent nearly an hour cutting out my stamped image…those little tiny legs and delicate feathers. Using a combination of scissors, xacto knife, sweat and blood, I finally managed to pry the wretched thing away from the cardstock. At any point during that one gruelling hour, I would have done anything for the PixScan technology…
Okay, so why I’m REALLY excited about the PixScan for the Silhouette:
1. cutting out stamped images
Instructions: Stamp an image using preferably medium to dark ink. Use PixScan as demonstrated above. Cut. Apply as desired.
You can probably use lighter inks as well but if you wanted to create a mask over your image to make an outline around it and cut around your irregular shape as close as possible (like print and cut), the software may not be able to pick up inks that are too light (like yellow).
You might be wondering now, how to cut around an image of choice (ie. print and cut)? Look at this video from UnderACherryTree.
I always admire the stamp and die sets that you can purchase from places like Simon Says Stamp and more recently at my local Michaels store. That is until you look at the astounding price tag and have a heart attack. Such a tiny stamp…with such a tiny die…for 50 dollars??? I could eat out for lunch and buy groceries for a week with 50 dollars! However cute the projects you could create with such a set, the notion of using one of these stamp/die sets is exactly that…a notion. It’s not easy being a student with an expensive hobby…that’s why I always have to be careful of how I spend my money. Which brings me to my next point:
2. It’s economical.
Instructions: buy a PixScan mat. And a Silhouette cutting machine if you don’t already own one.
Martha Stewart makes these little stamp and punch tools where you stamp an image and cut around the shape precisely. However they’ll run you for about $25 bucks a piece. As mentioned earlier, the die and stamp sets go anywhere from 20 dollars to 50 dollars.
The PixScan mat is 14.99 USD. almost half the price of other stamp/die sets. Buy it here.
However the Silhouette Cameo is $270 at Michaels.For a cheaper option, consider the Silhouette portrait which goes for $129 when it’s on sale. Check Amazon, they usually have good deals.
3. The possibilities are endless.
Instructions: Select ANY cute image for a project. Now use the PixScan to cut it out. Apply as desired.
You aren’t limited to just one image or just one shape to cut or just one type of material. You can try so many different things!
If you had a piece of patterned paper with say…many different stars of different sizes. You find that you don’t have the right paper punch and you need to cut out 2 dozen for cupcake toppers. This would take forever cutting out by hand…No problem, just send them through the PIxScan. Done in likely 5-10 mins.
4. Sketch precisely at any desired location on your patterned paper.
Instructions: Use Pixscan with desired paper. Sketch in appropriate location on paper.
I don’t know why Silhouette never really showcases their sketch feature but it’s actually quite capable of many different things. I have to say at this point, I do not know whether or not the software allows you to use the sketch feature with the PixScan but I can’t imagine why they wouldn’t allow you or why they wouldn’t implement this ability in the future.
For example, if you wanted to sketch something on patterned paper or a die-cut piece, you can do so using the PixScan.
I imagine this would be really popular for things such as invites, greeting cards, place cards, tags, etc. Or maybe you just have ugly writing and you’d rather your recipient be able to read your heartfelt sentiments on your irregular shaped paper. You can’t print on non-standard papers in the shapes of stars, moons and heart. Believe me…I’ve tried…it’s not pretty. But you can sketch on it with the PixScan! Cool huh?
5. Cut out your photographs with utmost precision!
Need to precisely cut a photograph to fit in a project piece like a specific frame? Or need to cut out your child’s head to paste on every imaginable surface within reach? Inanimate or animate? (Disclaimer: I do not have children, but I certainly admire the creativity, and sometimes voraciousness, exhibited by women who do).
Look no further, you can use the PixScan!!!
Okay…now I’m tired out from being overly excited about this. So now I’m going to put a damper on this technology as a warning of the possible pitfalls:
Why the PixScan may make you rip out your hair:
As much as I love the Silhouette Studio software, I can’t say it doesn’t come with its limitations. Even being an advanced user of Adobe Illustrator, I sometimes struggle to make the perfect line, curve or outline using the studio software. Perhaps the Designer edition would diminish some of these frustrations but most Silhouette users will own only the studio software.
Therefore, take the PixScan technology with a grain of salt:

There is a learning curve to using the PixScan and adapting it to do what you need it to do for your projects. There are tons of youtube tutorials out there that teach you how to use the Studio software to its full potential but it’s not going to be a walk in the park and it will be time consuming. Hopefully the satisfaction you receive from creating a masterpiece exactly as you imagined it (or even better) will be reward enough for you to take the leap and learn a new skill. I personally feel the end result is worth the effort but it’s up to you what you feel you can do. You can still create beautiful, unique and one of a kind results with even just basic computer skills using the software if handling some of the more advanced features are a little over your head.
So don’t be shy, hop over to youtube and get your brain juices on.
And don’t forget to comment below your thoughts and questions on the new PixScan from Silhouette.
Disclaimer: I do not work for Silhouette America, I just love their products and I want to share my wonderful experiences with the world. I have owned a PixScan for about 3 years now and have used it a few times but I haven’t taken advantage of the full capabilities of it which I am really looking forward to doing very soon!