Category Archives: Freebie

Free Dog Rules Poster Cutting File

07-22-2018

A new updated file can be downloaded here~

dog poster.jpg

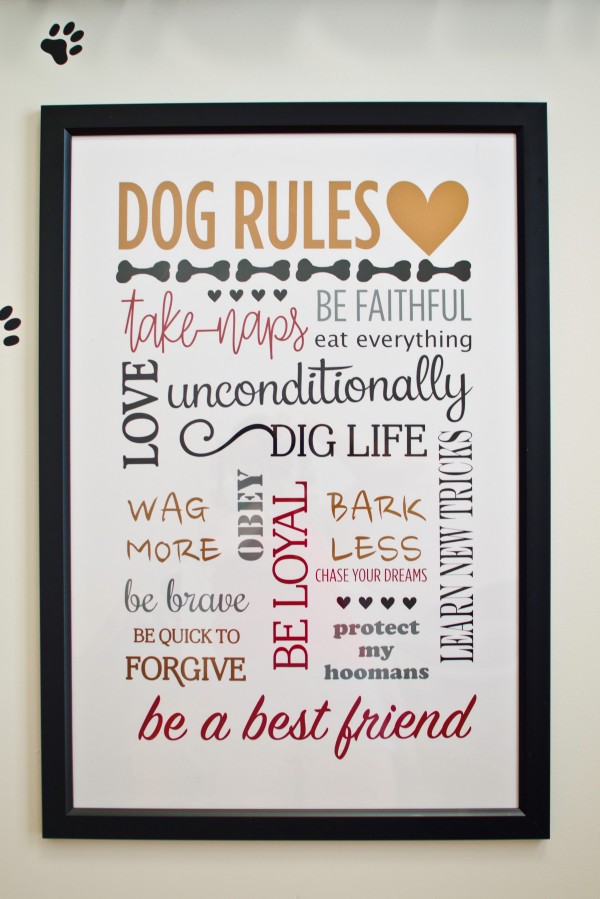
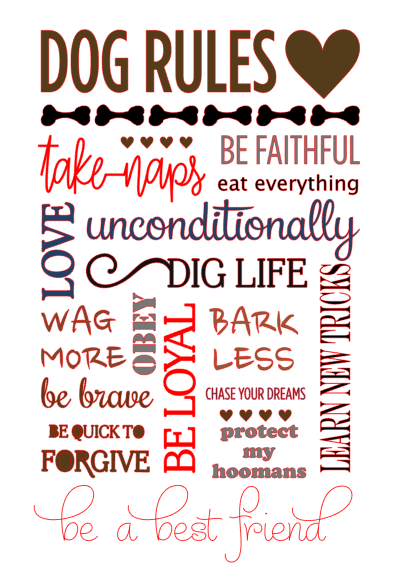
A new cutting file for the silhouette cameo! I have been planning to make a poster for my pooch Trigger for some time now! I was contacted by Shopcraftables shortly before I started my project and the following design is in collaboration with them.  Check them out for all your vinyl and heat transfer material needs!

Screen Shot 2018-06-10 at 10.25.05 PM

Download the file here.

The design is for a 20×30 inch poster and in a .studio format. If other formats are desired, please post a message below!

I will be posting pictures of the completed project using vinyl from Shopcraftables soon!

Tutorial – 3D light up marquee letters

If you’re just looking for the cutting file, the edited version of the letter “G” can be downloaded here

For tutorial, please see below!

Hello! It’s been some time since my last blog post! So much has happened and it’s been a whirlwind of activity. I finished my doctorate degree, moved across the continent to the east coast where I’ve set up my new home and started a post-doc fellowship. But I couldn’t leave without bringing with me my precious crafting supplies! I even packed my Silhouette Cameo in my luggage (I’d forgotten to pack it in the shipping cube…oops!).

After we got set up in our new home, our baby came join us in the east coast and he had a big road trip all the way from Vancouver!

IMG-5962

To welcome him home, I decorated his own little corner. I wanted to make it really special write his name out in lights! So I made 3D marquee letters that actually light up by remote control! It took a whole week’s worth of evenings but it was well worth it. It turned out better than I imagined!

I used paper to make the 3D letters using Carina Gardner’s marquee 3D letters cutting files from the Silhouette design store. The files and a tutorial from Carina Gardner can be found here.

In general, I really liked these letters; however, I found that some of the letters were somewhat confusing to assemble and some pieces were sized a little strangely so they weren’t the same size as the other letters. I don’t know if I assembled them erroneously as I found the that there were minimal instructions. There were some guidelines on Carina Gardner’s website. As a perfectionist, this bothered me a lot so I edited some of the pieces. For example, for the letter “G”, one piece was too long so I shortened it, and rounded out a bit more the front piece. This 3D “G” letter can be downloaded here. 

Some of the other rounded type letters like the R could also be shaped a bit better but the straight letters like the “I” or the “T” could very easily be assembled. For additional questions on assembly, check out Carina Gardner’s website or leave a comment below.

To make the letters light up, I purchased dimmable fairy lights from Amazon

The fairy lights came with a remote control too so that I could control brightness of the lights. The wire also bends so that I can make it into any shape I like. I really LOVE these fairy lights!!! Also they’re LED lights so they don’t heat up even after being on a long time so that there’s virtually no fire hazard. Remember that the letters are made of paper and if you use non-LED lights, they may heat up and burn the paper and cause a fire.

To attach the fairy lights, I lined up the lights with the holes in the marquee letters and just used a strong tape (here I used masking tape) to adhere the wire part to the back of the letters.

To hang the letters on the wall, made holes using a hole punch on the sides at the top of each letter and just strung a string through all the letters. I hung the letters to the wall using a dozen and half of these Command decorating tips. These are great because they don’t damage the wall.

And here’s the final product:

IMG-5932

IMG-5930


Hope this tutorial was easy enough to follow! Leave a comment below and let me know how you liked this tutorial!


Gorgeous Barefoot Sandals and Life Updates

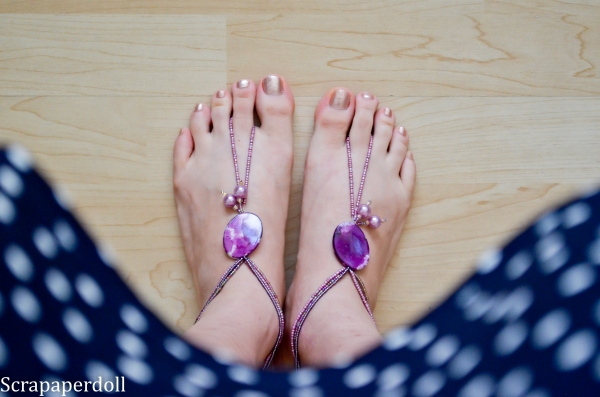
DSC_0935

Barefoot Sandals:

My friend brought me a pair of these gorgeous barefoot sandals that she handcrafted and designed all by herself. What an exciting gift because it made me think about all the adventures that I will now embark on with my new barefoot sandals! These are perfect for walking on the beach without your sandals, but having accessorised feet! She even made some wedding-themed ones for her sister in law who is getting married!

I wanted to share with you her beautiful creation, if she lets me, I will try to film her making one of these as a tutorial on how to make it!


Life Update:

Recently I’ve been away for a few months because I’ve been struggling a lot with the different events in my personal and academic life. 2016 thus far has been quite eventful and not necessarily in a good way. There have been many high points but also many low points too. All of this culminated in being hospitalised and having emergency surgery for appendicitis. But by God’s grace this may have been the best thing that’s happened to me all year because it’s reminded me of the first time I was there, lying on a stretcher, waiting to go under the knife and scared about the consequences. But just like the first time, a spirit of peace came to me, and then I wasn’t scared. It reminded me that God has a plan for me and that He plans to give me hope and a future. With that kind of encouragement, I found great peace and joy in closing some doors in my life while opening others. I am eager to see where my God leads me in the future!

During my recovery  many friends came to visit with me, sit with me, let me chatter on about my life. They encouraged and prayed over me to receive healing. I am so grateful for their expression of love.

I am hopeful that I can be more present on my blog from now on and continue to document all of my creations!


Lucky St. Patty’s freebie – Nespresso grand crus holder/organizer

*update May 20, 2018
A nice visitor to my blog informed me that my old link no longer works so I’ve transferred the file to Dropbox. Just click the link here or below to access the free dispenser file! 


Happy March!

It’s the happiest month of the year, there is no better better month than March!

So in celebration of March and Saint Patrick’s day, I’ve created an organizer/holder for the nespresso grand crus. I didn’t want to shell out the money to pay for one because they’re so expensive.

Download the Nespresso dispenser here!

So I used my silhouette cameo to print 4 of them and then I assembled them by folding along the dotted lines.

2014-1

You can also line them up one next to the other so you have a row of them. You just insert the rectangular tubes in after opening. Every time you want to have a nespresso, just lift the box of the flavour you want and one capsule will pop out!

So easy! So this is how I’ve been storing my nespresso capsules!

2014-2

I would love to hear your comments or suggestions for improvement!

Enjoy~