My tutorial on how to make a vintage style Christmas card!


The 3 photos above show the one that I created last year and sent to one of my friends but since this was such an awesome and lovely card, I wanted to make a bunch more this year too and give them away to other friends as well. It works quite well if you’re looking for a Christmas card to give to one of you guy friends because it’s not too girly haha!
This card has a postcard theme and I specifically bought this stamp from Michaels because I love the look of postcards. For this tutorial, it will take some time to complete but the steps are easy and the final product is beautiful!
I’ve added an extra layer of vintaging to the tutorial by making a crackle effect! I think it looks soooo lovely with the extra details. Whoever receives this card is going to feel truly blessed this Christmas season by all the work you put into this card.
The supplies you’ll need:

1. One 5 1/4 x 3 3/4 inch manilla/cream cardstock
2. On 4 x 5 1/2 inch cream card and envelope (I’m using the Recollections brand of card/envelope)
3. Red and Green Stickles or other glitter glue
4. Fast-drying Tacky Glue (Scotch)
5. ATG gun/tape runner
6. foam dots

7. Archival black ink (StazOn Jet Black)
8. Distress Ink – Vintage Photo and Walnut Stain with foam daubers
9. Red stamp pad – colorbox in red

10. Silver “Merry Christmas” stickers
11. Postcard Stamp – Stampendous Snow Postcard
12. Tim Holtz French Market Acrylic stamp set – postage stamp piece
13. Acrylic Block – Martha Stewart (the one with foam feet)
14. Ranger Crackle Paint in Rock Candy

Instructions:
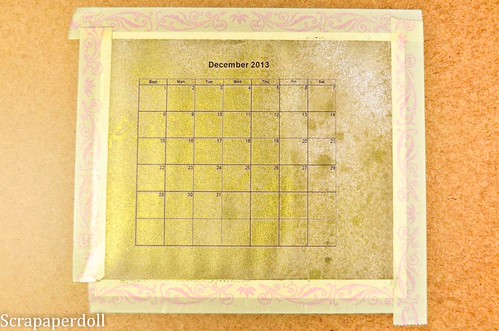
1. Place your inset cardstock piece on a craft mat and tack it down with washi tape to avoid dislodging it when stamping.
2. Ink up the postcard stamp with black archival ink and line up the stamp using the guides of the craft mat.

3. Using Scissors or a paper distressing tool, distress the edges of the cardstock.

4. Ink up the foam dauber with Vintage Photo and rub around the edges of the cardstock being careful not to distress the centre of the image too much. I think I may have overdone the centre a bit but you won’t make that mistake! Then ink up a foam dauber with Walnut Stain and distress the edges of the cardstock to make the image pop.
 5. Using Rock Candy Crackle Paint and generously layer the cardstock with a layer of the paint. Be careful as some of the vintage photo distress ink will transfer to your paint brush, but only a little bit. Let it dry for about 30 minutes. If you’d like to speed up the drying time, once it’s started to dry and you can clearly see crackles, the bottle says you can use a heat tool to speed it up. Just don’t use your heat tool right off the bat, then you won’t get any crackling. I just let it dry by itself and work on other parts of the project in the meantime. After the crackle paint has COMPLETELY dried (very important this!) put a big text book or dictionary over top of it and let it flatten out since the wet medium has made it crinkle and warp. Let that sit at least an hour to overnight.

6. Ink up the French Market postage stamp acrylic stamp piece with your red stamp pad of choice. I’m using a red colorbox pigment ink. Don’t use distress inks here as the fine details of the stamp will become blurred by the wetness of the distress ink. Then stamp it on some scrap cream cardstock and cut around the edges leaving just a little bit of a border.
 7. Use foam dots to attach your red stamp to your now dried piece of cardstock with the stamped postcard and crackled image right over the stamp portion of the postcard image. I found that my foam dots didn’t attach so well the distressed crackle paint so I added a few extra dots of tacky glue to really make a good stick.
8. Use red Stickles to make holly berries over the stamped postcard image and use the green stickles to fill in the holly leaves. Let dry at least 45 minutes to 1 hour. You can see that my cardstock even sitting under a heavy physics textbook, is still a little warped. Once we glue it to our card, it’ll flatten out.

9. Finally, using your tape runner, adhere your cardstock piece to the card. Since we used the wet crackle paint medium on the cardstock, it’ll be a bit wrinkly and won’t lie flat. Mine had edges that came up after sticking it down to the card with my ATG gun. So I used my tacky glue around the raised edges and pressed for a few seconds and wiped away the excess glue with my finger.

And tada~ the final project all done!
I’d love to hear your comments and suggestions to make this card even better and help out others looking for more efficient techniques!
And please share your vintage style Christmas cards too!