Category Archives: Silhouette Cameo

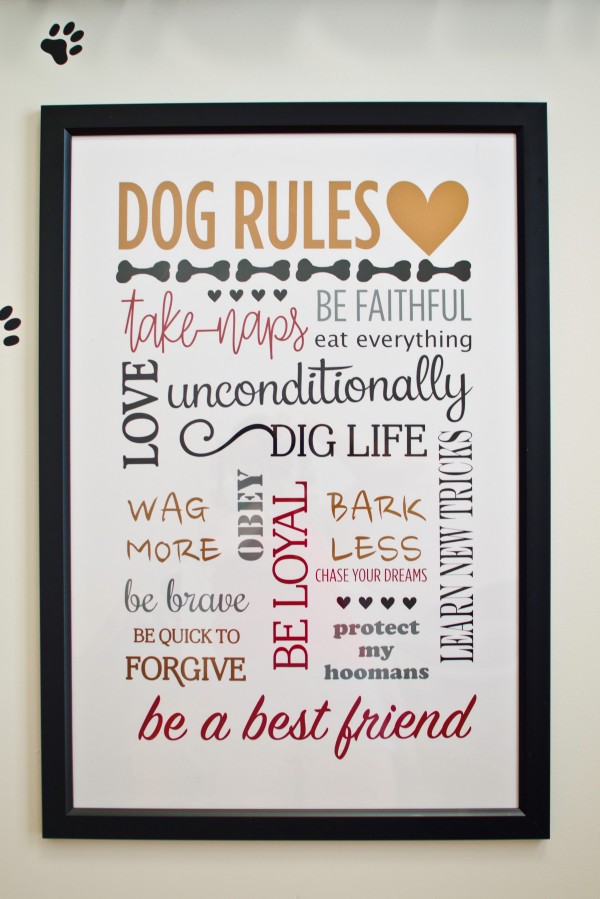
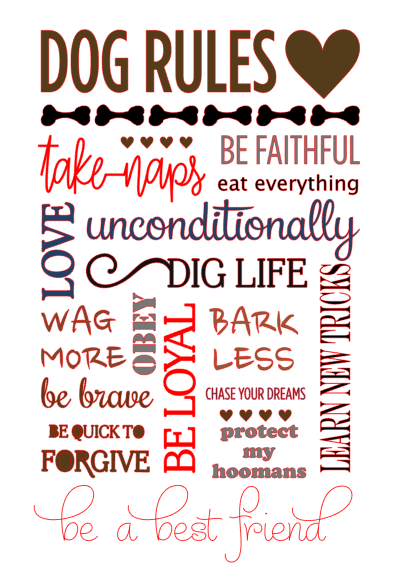
Free Dog Rules Poster Cutting File

07-22-2018

A new updated file can be downloaded here~

dog poster.jpg

A new cutting file for the silhouette cameo! I have been planning to make a poster for my pooch Trigger for some time now! I was contacted by Shopcraftables shortly before I started my project and the following design is in collaboration with them.  Check them out for all your vinyl and heat transfer material needs!

Screen Shot 2018-06-10 at 10.25.05 PM

Download the file here.

The design is for a 20×30 inch poster and in a .studio format. If other formats are desired, please post a message below!

I will be posting pictures of the completed project using vinyl from Shopcraftables soon!

Tutorial – 3D light up marquee letters

If you’re just looking for the cutting file, the edited version of the letter “G” can be downloaded here

For tutorial, please see below!

Hello! It’s been some time since my last blog post! So much has happened and it’s been a whirlwind of activity. I finished my doctorate degree, moved across the continent to the east coast where I’ve set up my new home and started a post-doc fellowship. But I couldn’t leave without bringing with me my precious crafting supplies! I even packed my Silhouette Cameo in my luggage (I’d forgotten to pack it in the shipping cube…oops!).

After we got set up in our new home, our baby came join us in the east coast and he had a big road trip all the way from Vancouver!

IMG-5962

To welcome him home, I decorated his own little corner. I wanted to make it really special write his name out in lights! So I made 3D marquee letters that actually light up by remote control! It took a whole week’s worth of evenings but it was well worth it. It turned out better than I imagined!

I used paper to make the 3D letters using Carina Gardner’s marquee 3D letters cutting files from the Silhouette design store. The files and a tutorial from Carina Gardner can be found here.

In general, I really liked these letters; however, I found that some of the letters were somewhat confusing to assemble and some pieces were sized a little strangely so they weren’t the same size as the other letters. I don’t know if I assembled them erroneously as I found the that there were minimal instructions. There were some guidelines on Carina Gardner’s website. As a perfectionist, this bothered me a lot so I edited some of the pieces. For example, for the letter “G”, one piece was too long so I shortened it, and rounded out a bit more the front piece. This 3D “G” letter can be downloaded here. 

Some of the other rounded type letters like the R could also be shaped a bit better but the straight letters like the “I” or the “T” could very easily be assembled. For additional questions on assembly, check out Carina Gardner’s website or leave a comment below.

To make the letters light up, I purchased dimmable fairy lights from Amazon

The fairy lights came with a remote control too so that I could control brightness of the lights. The wire also bends so that I can make it into any shape I like. I really LOVE these fairy lights!!! Also they’re LED lights so they don’t heat up even after being on a long time so that there’s virtually no fire hazard. Remember that the letters are made of paper and if you use non-LED lights, they may heat up and burn the paper and cause a fire.

To attach the fairy lights, I lined up the lights with the holes in the marquee letters and just used a strong tape (here I used masking tape) to adhere the wire part to the back of the letters.

To hang the letters on the wall, made holes using a hole punch on the sides at the top of each letter and just strung a string through all the letters. I hung the letters to the wall using a dozen and half of these Command decorating tips. These are great because they don’t damage the wall.

And here’s the final product:

IMG-5932

IMG-5930


Hope this tutorial was easy enough to follow! Leave a comment below and let me know how you liked this tutorial!


Copic marker-colored Christmas cards

It’s been some time since I made a post, almost half a year in fact. My time flies! Life has been eventful in many good ways and I’m looking forward to sharing with you all many of my creations these past few months.

This slideshow requires JavaScript.

But first off, I’d like display some of the Christmas cards I’d made for my friends and family this past Christmas. Copic colouring has become a new hobby of mine and because they’re so pricey, I managed to snag a few cheaper knock off alcohol markers on Aliexpress. I’ll put up a blog post about that soon but from my initial foray into alcohol markers, they seem to work quite well!

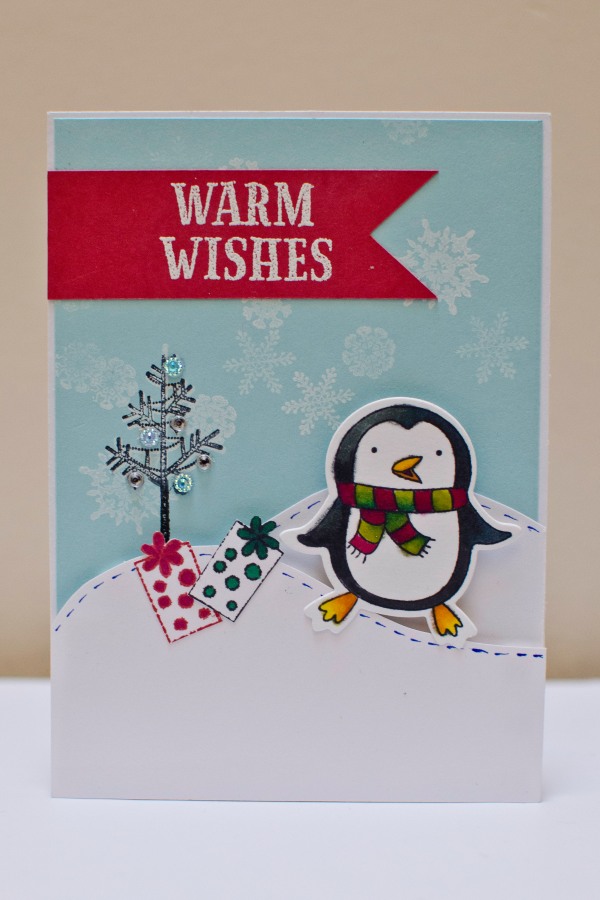
I wanted a cute and wintery theme for my cards so I used my Hampton Art Stamp and Die set – Penguins.
SC0714 Stamp & Die Set - Penguins

In order to use this die you need to have a Sizzix or cuttlebug die-cutting machine.

I stamped the image of the penguins using Memento in Tuxedo black by Tsukineko which is one of the best dye inks for alcohol marker coloring. After coloring the penguins, I cut them out using the penguin die.

To decorate the cards I used a few different kinds of backgrounds, here are a few:

1. staggered snow fields. I used foam dots to create dimension on the snow fields. I used a blue cardstock as the background and stamped white snow flakes .

dsc_0585

2.  A fat ornament on an embossed background. I purposely made the ornament enormous so that it would take up half the card. I cut the ornaments out using my silhouette cameo to the size I wanted. Finally I decorated the ornaments with rhinestones or ribbons.

Finally I used a banner with a white embossed greeting and attached the penguins with a foam dot to make it 3D.

I loved the rhinestone-embellished ornament so much that I made card featuring just the ornament on an embossed background!

Well that’s it I hope you enjoyed these cards and stay tuned for more!


Cheap Thrills and Pretty Frills – Scrapbooking on a Budget

As a student, I don’t have a lot of extra cash to splurge on expensive embellishments, fancy papers or even foam tape. Over the years, I’ve come to be very adept at looking for deals and cheap thrills when it comes to paper crafting. And who’s noticed that it’s almost impossible to get decently priced shipping of anything to Canada? The US economy would be booming if only they shipped to Canada at reasonable prices! So more often than not, I and my crafty friends opt out of cheap US prices and pay the premium at Michaels. It’s still cheaper than paying for shipping. But don’t worry, below are some ways I get around these problems.

So if you love to craft but can’t afford to splurge, there are still ways to achieve beautiful creations using thriftier methods. Read on to see my tips:

*Disclaimer, I am not paid to advertise these companies, these are just the ones I use and in my opinion the cheapest products I can get in Canada and I wanted to share these money saving tips with other scrapbookers.

  1. ATG double sided tape
    Who doesn’t love ATG tape or just using double sided tape in general? But at 16.99 CAD for two rolls, I used to tape just the corners of a square and pray that my paper would stick…
    So here’s a cheaper alternative to ATG tape, check out The Tape Depot

    For ~$26 USD, you can get 12 rolls of ATG-compatible double sided tape at a variety of sizes. My favorite size is 1/4 inch. This comes out to just over 2 bucks a roll! Much better than $8.50 per roll from Michaels and many other scrapbookers claim that this tape works even better than 3M brand ATG tape!

  2. Silhouette Cameo Accessories and ProductsThe Silhouette online store has a full line of silhouette products but they’re usually slightly more expensive than other online stores (but still half what they charge at Michaels).Some of the best prices I’ve found in Canada are on amazon. You can usually get mats, blades and tools for a few dollars cheaper and they’re often part of amazon prime or offered as part of a free shipping deal. For example, I can often buy blades for 10-12 dollars each.

    Others have used Silhouette “compatible” blades like the Graphtec CB09 which can cost only 2 dollars a blade. I’ve personally not tried this before but many claim that the blade stays sharper even longer than the silhouette brand ones.

    BLACK FRIDAY DEALS on the Silhouette online store
    There are really no silhouette deals like the silhouette black friday machine and accessory bundles. For example, a portrait bundle for $99. If ever my cameo broke, I’d wait until black friday to replace it, or if I wanted to try one of their new machines like the Mint. It’s the same price as normal but they throw in extra accessories.

    Check out the silhouette online store here.

    The Silhouette Design store has monthly design sales for up to 50% off. Sign up for their newsletter to be notified of all their deals.

  3. Heat Transfer Fabric/Vinyl       Heat transfer material is so awesome but they cost 16.99 a roll on the Silhouette website and $24 bucks at Michaels and you only get about 3 feet of the stuff. I can usually make…maybe 2-3 T shirts per roll.Well, there are a ton of websites out there that sell high quality heat transfer material or adhesive craft vinyl (not heated, just for sticking on smooth surfaces) for much cheaper. One I’ve used recently is Flex Heat Transfer Vinyl.
    Heat transfer and craft vinyl for $3-4 dollars a sheet and it comes in a 12″x 20″ sheet so that it feeds directly into my silhouette cameo.

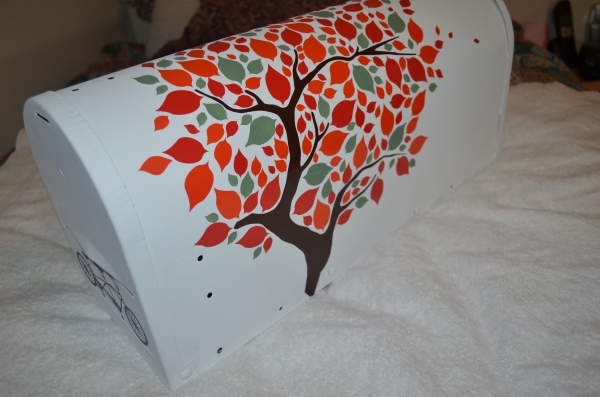
    Check out the mailbox I made for my friends for their wedding using the craft vinyl: DSC_0403

  4. EmbellishmentsStickers and gemstones can be quite pricey but there are many nice adhesive rhinestones and 3D stickers, ribbons and storage containers from your local dollar store.
  5. Eyelets and BradsEyelets are commonly used in sewing and fashion and you can often find a variety of simple eyelets from fabric stores for very cheap. I get mine from Dressew for 25 cents for 50-100 eyelets. Yes, that’s 25 cents! They also sell a plethora of ribbons, beads and flowers for all your crafting needs. They also have a scrapbooking section but I find the quality of the products not up to my standards. But they would certainly be useful to someone trying out scrapbooking for the first time because they’re very cheap.
  6. Michaels CouponsMichaels sends out coupons every week and their best ones are the 50% off one regular priced item or the 25-30% off entire regular and sale purchase. Never buy anything from Michaels for full price because they mark up their items by like 300%.Best part is you don’t have to print out the coupons, just show them on your smartphone. You can find Michaels coupons on their website flyer.
  7. Pay US shipping prices (often free) even if you live in Canada.                   This tip only applies to people who live close to the US border. Ship your items to a shipping and receiving company (like Hagen’s of Blaine) and drive across the border to pick it up. And fill up on the cheap gas while you’re there!


There are many other cost cutting methods I use but they typically involve keeping an eye out for clearance items and finding deals. There are lots of deals at Michaels but the best ones usually sell out immediately so check back often or just be lucky!

What are some of your money-saving tips? Share them below!


Hack for the Silhouette Cameo Print and Cut – Read Registration Marks Fail

silhouettemainimage1

09-13-15 UPDATED SOLUTION AT THE BOTTOM
To avoid making the same silly mistake I did haha!

I don’t know why after the recent Silhouette studio software overhaul to version 3 there have been so many issues with my print and cut feature that I never experienced before with the old Studio software. Even with the most recent update V3.36 I still encounter the same issues. Looking around on the web hasn’t really fixed my problem because most people claim something magical and random happens when they try a combination of different things like load and unload or turn the machine on or off.

But with my issue, I found that the laser scanner just wasn’t moving the cutting mat far enough to even read the registration marks.

I’ve tried to do the whole manual registration function but I’ve never managed to get it to work, I’m not sure if I’m just doing it wrong or if this manual read function is just bogus.

Regardless, I found a solution to my problem and here’s my hack for getting the silhouette cameo to read the registration marks every time:

  1. Select image to print and cut.
  2. Print image with registration marks.
  3. Adhere printed sheet with registration marks to cutting mat.
  4. Feed/load the cutting mat into the machine.
  5. Turn off the machine. Yes, turn off the machine. Do not remove the cutting mat from the machine when you do this.
  6. Once the light is off, turn the machine back on.
  7. Press “enter” to load the cutting mat again. This will feed the mat a little further in, tricking the machine to think that it’s feeding it the first time around but this time the mat will actually feed more than if you unloaded and loaded again.
  8. In the Silhouette Studio software, press “send to silhouette”.
  9. Sit back and watch the magic happen.

I hope that this hack is useful to some of you who are having a heap of trouble with the print and cut feature like I was. There must be a solution to this problem that I’m missing, perhaps a calibration issue. I’ll keep doing my research and once I find out a solution, I’ll post it.
But in the meantime, if you were having the same problem as I was, perhaps this will solve your issues.

Another thing to consider is that I had to calibrate my cameo to work with my Pixscan mat as well which may have dislocated some virtual limb inside the machine.

Post your solutions/hacks to the Silhouette Cameo print and cut – registration marks fails below!

*UPDATE September 13, 2015
I figured it out.

Turns out on the machine before you even feed your material into the rollers, you use the up and down arrow keys to select whether you want to feed the cutting mat or other media not requiring cutting mat.

2015-09-13 15.49.53

On cutting mat option, the rollers feed the mat into further than with the “media” option. The “cutting mat” option is required for the print and cut function to work. I had selected the “media” option by accident and didn’t realize it, that’s why the rollers weren’t feeding my cutting mat far enough into the back of the machine for the registration marks to read. So there you go. If ever you run into the same problem as me, just double check your selection on the machine control screen. (See where that big black dot is on the upper left side of the screen? That’s the option you’ve currently selected.) Use the arrow keys to change it to the correct type of media.

I’ve tried manually reading the registration marks. I don’t quite understand why they have this function because it has never worked for me even when I have the correct feeding function selected.

Lucky St. Patty’s freebie – Nespresso grand crus holder/organizer

*update May 20, 2018
A nice visitor to my blog informed me that my old link no longer works so I’ve transferred the file to Dropbox. Just click the link here or below to access the free dispenser file! 


Happy March!

It’s the happiest month of the year, there is no better better month than March!

So in celebration of March and Saint Patrick’s day, I’ve created an organizer/holder for the nespresso grand crus. I didn’t want to shell out the money to pay for one because they’re so expensive.

Download the Nespresso dispenser here!

So I used my silhouette cameo to print 4 of them and then I assembled them by folding along the dotted lines.

2014-1

You can also line them up one next to the other so you have a row of them. You just insert the rectangular tubes in after opening. Every time you want to have a nespresso, just lift the box of the flavour you want and one capsule will pop out!

So easy! So this is how I’ve been storing my nespresso capsules!

2014-2

I would love to hear your comments or suggestions for improvement!

Enjoy~

Review on silhouette stamping material and Silhouette haul

Silhouette Stamp

Today I wanted to review some of the products in my latest Amazon and Silhouette America haul. I drove all the way down to the states to pick it all up since prices for shipping to Canada is what I personally consider thievery. Taking advantage of the free shipping to the US and 30% off heat transfer material I grabbed a whole bunch of different supplies:

1. transfer material: yellow, glitter black, more white (because it’s so generic and useful) and this lovely teal colour that I’m sure is going to match so well with the yellow and white!

2. Stamping material and the perforated mat

3. Silhouette Fabric blade – which BTW is supposed to be the same as the normal black blade, just a different colour so you don’t get yourself all mixed up. You’re not supposed to cut fabric and paper with the same blade because it dulls the blade that way. That’s also why you never cut paper with your fabric shears.

4. thumb notch punching tool from WeRMemoryKeepers for my project life needs

5. project life photo pocket pages in design G and a WRMK one #50032-3

6. pick me up tool – for rhinestones and very small pieces of paper my chubby fingers are too indelicate to handle.

7. the much raved about pixscan mat which I personally raved about in my earlier blog post.

So the first thing I did with all my brand new loot was create a pretty stamp using the silhouette stamping material.

My BFF requested a stamp to personalize her creations so I created a logo for her using the silhouette studio software which you can take a look at below:

Cut-out stamp mounted on an acrylic block and inked with red pigment ink
Silhouette Stamp

Stamped red on white cardstock with the cut-out stamp below it
Silhouette Stamp

So here are my thoughts on the silhouette stamping material:

Who would benefit the most from creating their own stamps using the silhouette:

In general, I think that anyone who is comfortable using the basic functions of the silhouette studio free software and the usual troubleshooting involved would be able to handle cutting the stamping material.

The individuals who would benefit the most are those who are comfortable using the more advanced functions of Studio, both free and designer versions. For example, if you understand how to weld, cut, trace, then you could make some pretty cool personalized designs.

PROs:

1. Make my own stamps to suit my crafty needs.

I really love the idea of being able to create my own stamps to use with whatever project I want. For example making a personalized logo which I can just stamp on all my projects before I give them away or as a way to promote my brand.

2. Cool and unique stamps can be made even using the free studio software.

I only have the free version of the software and I managed to make that really cool stamp design by welding the words, editing points, cutting and merging where necessary. All of these tools were available to me through the free studio software.

I would love to get the designer version of the software but unfortunately, it’s a little too expensive right now so I’m waiting for a sale.

3. The material inks up and stamps really well!

As you can see above, I get a clear, crisp image which I was not expecting. I thought it would be just a little blotchy or irregularly shaped as the cut isn’t perfect. But upon stamping, it was totally fine and those little areas where the cutting wasn’t as smooth didn’t even show up after stamping on cardstock. I am using Colorbox pigment ink. 

Despite the ink also inking up on the acrylic block, when I stamped, none of the off-target inking transferred to the cardstock which is amazing! Even commercial stamps I get frustrated sometimes because if you press just ever so slightly harder than the sweet spot, you get a big splotchy image. But not with this stamp.

3.  Designs are fairly intricate.
The box instructions do say “Make sure all cut lines are 1/16 inch apart“. I didn’t measure it exactly but as you can probably tell by the ruler in the photograph, the stamp I cut out was about 4 cm in width and 2.5 cm in height. I’ve got some pretty thin lines in this image. I’m not sure if I could get it any thinner than that but I probably could since I’ve seen other people do it. I just haven’t tried yet since this was my first shot.

But not bad for my first shot eh?

4. Fun!

It has been a lot of fun learning how to use the silhouette studio software, the user interface is very much like adobe illustrator (but not as complex) and lots of people actually use it to design commercial products/projects.

It feels very rewarding to come up with a creative idea and then have the tools to make it come to fruition. I thoroughly enjoyed every step from the initial brainstorming and vision to creating my design to actually cutting it out and stamping with it.

CONs:

1. There’s a limit to how small a line you can cut and sometimes for the smaller pieces like holes in the “O’s” etc. the pieces of stamp material get stuck and you have to rip them out. That ripping part created a jagged edge and sometimes causes tears in the stamp itself.

For example, the first time I made this stamp, I made it about 3.5 cm in width and when I ripped out the centre part of the “O” which was stuck pretty firmly, it ripped the top part of the “O”. So it looked more like a “U”.

After some troubleshooting on size of stamp to cut and careful extraction procedures using a combo of nails and exacto knife, my second stamp attempt resulted in an intact “O”.

2. Stamp material flimsy.

So it’s great that the material is soft enough that you can cut it with the silhouette but afterwards it’s flimsy and flexible. Unless you have an acrylic block with grid marks on it, it would be near impossible to have a stamp mounted straight. So I suggest investing in a good acrylic block with grid lines so you can align your stamp to the grid to make it actually stamp the way you want to. I suggest the one offered by Martha Stewart with the little foam pads (as shown above).

If you ever remove your stamp from the block and then put it back on, you won’t get the same stamped image twice unless you cut out a rather chunky and solid stamp. If the material were a little sturdier that would be nice. Not a huge deal if you aren’t a perfectionist.

3. Choice of inks is limited to the pigment variety.

The best type of ink to use with this material is a nice pigment ink. Not even the distress inks will do because it will just bead up on the stamp. Use something like colorbox pigment ink or there is also the generic Michaels brand pigment inks. Tsukineko also makes some good ones as well.

Avoid the archival dye inks because those will just create beads and you’ll get a stamped image of bubbles…unless that was the look you were going for.

Anyone else try other types of inks that worked?

Anyways, tons of possibilities and I’m just starting. Can’t wait to try out my Pixscan mat so stay tuned for that!

Graphic Tees using my Silhouette Cameo!

A few weeks ago, my boyfriend and I celebrated our anniversary and being the nerdy scientist I am, I decided to make us some couple T shirts with a video game theme.

So I hopped over to Michaels to pick up a box of white heat transfer material and picked a few simple cotton tees from Joe Fresh at superstore.

White Heat Transfer Material

I found this really fabulous idea from Matt Allison’s blog for couples tees where one wears pacman and the other wears ghost! I couldn’t use the template that’s on his site but I did find some similar images which I imported into silhouette studio. There are lots of tutorials on youtube which show how to do this. Here’s one from Kristina Werner from KWerner designs.

After cutting out the heat transfer material, I eyeballed where the designs should go and ironed these babies on! Initially I had a really tough time trying to iron the cut outs. The box says to use a piece of cotton over top but scrapbook bloggers online suggest using a thin heat proof material like the liners that you use to cover the bottom of your oven. Alternatively you can also use the Ranger nonstick mat.

A neat trick if you want to save a few bucks is just go to a hardware/department store and pick up a sheet of oven liner. It’s essentially the same thing as a the much more expensive Ranger non stick mat.

Here are the T-shirts I made:
Graphic Tee Design JW 2014-1
I just love how these Tshirts turned out! They’re so vintage and simple! I loved the white on black because that’s how the video games used to be, just white characters on a black screen and this totally embraces that era.

Soon after, a few of my friends were having birthdays and I thought it would be totally fun and personal to gift them a graphic tee. These were my friends from highschool, then university and everyone’s moved onto bigger and better things. But being science majors we all still have a bit of nerdy inside of us.

So I made them these:

This T shirt features the elements oxygen and magnesium off the periodic table.
Graphic Tee Design JW 2014-3
And my other friend loves playing video games, we used to play our Nintendo DS together during breaks from class and her favourite game was super mario world!

So I thought this 1 up mushroom tee was super suitable for her:
Graphic Tee Design JW 2014-4


I loved it so much I couldn’t help but try it on hahahahaha

Graphic Tee Design JW 2014-2

Ignore the weird light spot on my nose…THIS IS NOT A NOSESTRIP hahaha

I’m so excited about exploring the possibilities and combining different colours and more elaborate patterns! So look forward to my next creations!


Hacks for the Silhouette PixScan – creative ways to use it!

Silhouette PixScan

As most people who own a Silhouette Cameo or Portrait already know, Silhouette America just came out with a new addition to their versatile cutting systems: the PixScan.

Honestly I’m surprised that this iconic machine didn’t come pre-built with the PixScan technology. But being the crowd-following individual I sadly am, I never questioned why it never existed even though I have, countless times over, tossed an idea in the trash because this technology wasn’t available in my moment of need. Therefore I am experiencing that sensation when you discover a new paper pad or Martha punch and you feel and overwhelming urge to just have that item in your possession. Yes, this is exactly how I feel about the PixScan mat.

So you might be wondering…what has gotten this crazy girl all obsessive about?

Well there are plenty of resources out there such as this fine blog which outlines the basic requirements for a Silhouette user (or non-Silhouette user if you so unfortunately happen to be one). Or check out the video from the Silhouette America website:

In short, it’s a sticky PixScan mat with registration marks already on it, you put your desired material/picture on it and then take a photo or scan it. Transfer the image file to your computer and import the image using the Silhouette studio 3.1 or higher software. The Software automatically detects the registration marks and makes a virtual flattened image of your picture (adjusting for angles, lopsidedness, overall shaky photography skills) at which point you can then proceed to create masks, outlines, shapes of every size, etc. etc. etc. to cut out of your material already tacked on to the PixScan mat. Just don’t readjust your picture or you’ll have to start all over again…

So why I’m excited about it…but first a little background on my experiences with cutting images out of paper…

It takes me forever to fussy cut a stamped image and I have never been able to master the detailed precision cutting that only my cameo could manage. And being the perfectionist I am, it is often frustrating when I can’t achieve the perfect cut of nice image from pretty printed papers. I always envied the crafty ladies who could cut such beautiful figures from their G45 papers or delicate flowers and whimsical animals off of a thin magazine page.

I remember one time when I was making a birthday card for my BFF and I had stamped a Tim Holtz’s stamp of a bird…I spent nearly an hour cutting out my stamped image…those little tiny legs and delicate feathers. Using a combination of scissors, xacto knife, sweat and blood, I finally managed to pry the wretched thing away from the cardstock. At any point during that one gruelling hour, I would have done anything for the PixScan technology…

Okay, so why I’m REALLY excited about the PixScan for the Silhouette:

1. cutting out stamped images

Instructions: Stamp an image using preferably medium to dark ink. Use PixScan as demonstrated above. Cut. Apply as desired.

You can probably use lighter inks as well but if you wanted to create a mask over your image to make an outline around it and cut around your irregular shape as close as possible (like print and cut), the software may not be able to pick up inks that are too light (like yellow).

You might be wondering now, how to cut around an image of choice (ie. print and cut)? Look at this video from UnderACherryTree.

I always admire the stamp and die sets that you can purchase from places like Simon Says Stamp and more recently at my local Michaels store. That is until you look at the astounding price tag and have a heart attack. Such a tiny stamp…with such a tiny die…for 50 dollars??? I could eat out for lunch and buy groceries for a week with 50 dollars! However cute the projects you could create with such a set, the notion of using one of these stamp/die sets is exactly that…a notion. It’s not easy being a student with an expensive hobby…that’s why I always have to be careful of how I spend my money. Which brings me to my next point:

2. It’s economical.

Instructions: buy a PixScan mat. And a Silhouette cutting machine if you don’t already own one.

Martha Stewart makes these little stamp and punch tools where you stamp an image and cut around the shape precisely. However they’ll run you for about $25 bucks a piece. As mentioned earlier, the die and stamp sets go anywhere from 20 dollars to 50 dollars.

The PixScan mat is 14.99 USD. almost half the price of other stamp/die sets. Buy it here.

However the Silhouette Cameo is $270 at Michaels.For a cheaper option, consider the Silhouette portrait which goes for $129 when it’s on sale. Check Amazon, they usually have good deals.

3. The possibilities are endless.

Instructions: Select ANY cute image for a project. Now use the PixScan to cut it out. Apply as desired.

You aren’t limited to just one image or just one shape to cut or just one type of material. You can try so many different things!

If you had a piece of patterned paper with say…many different stars of different sizes. You find that you don’t have the right paper punch and you need to cut out 2 dozen for cupcake toppers. This would take forever cutting out by hand…No problem, just send them through the PIxScan. Done in likely 5-10 mins.

4. Sketch precisely at any desired location on your patterned paper.

Instructions: Use Pixscan with desired paper. Sketch in appropriate location on paper.

I don’t know why Silhouette never really showcases their sketch feature but it’s actually quite capable of many different things. I have to say at this point, I do not know whether or not the software allows you to use the sketch feature with the PixScan but I can’t imagine why they wouldn’t allow you or why they wouldn’t implement this ability in the future.

For example, if you wanted to sketch something on patterned paper or a die-cut piece, you can do so using the PixScan.

I imagine this would be really popular for things such as invites, greeting cards, place cards, tags, etc. Or maybe you just have ugly writing and you’d rather your recipient be able to read your heartfelt sentiments on your irregular shaped paper. You can’t print on non-standard papers in the shapes of stars, moons and heart. Believe me…I’ve tried…it’s not pretty. But you can sketch on it with the PixScan! Cool huh?

5. Cut out your photographs with utmost precision!

Need to precisely cut a photograph to fit in a project piece like a specific frame? Or need to cut out your child’s head to paste on every imaginable surface within reach? Inanimate or animate? (Disclaimer: I do not have children, but I certainly admire the creativity, and sometimes voraciousness, exhibited by women who do).

Look no further, you can use the PixScan!!!

Okay…now I’m tired out from being overly excited about this. So now I’m going to put a damper on this technology as a warning of the possible pitfalls:

Why the PixScan may make you rip out your hair: 

As much as I love the Silhouette Studio software, I can’t say it doesn’t come with its limitations. Even being an advanced user of Adobe Illustrator, I sometimes struggle to make the perfect line, curve or outline using the studio software. Perhaps the Designer edition would diminish some of these frustrations but most Silhouette users will own only the studio software.

Therefore, take the PixScan technology with a grain of salt:

There is a learning curve to using the PixScan and adapting it to do what you need it to do for your projects. There are tons of youtube tutorials out there that teach you how to use the Studio software to its full potential but it’s not going to be a walk in the park and it will be time consuming. Hopefully the satisfaction you receive from creating a masterpiece exactly as you imagined it (or even better) will be reward enough for you to take the leap and learn a new skill. I personally feel the end result is worth the effort but it’s up to you what you feel you can do. You can still create beautiful, unique and one of a kind results with even just basic computer skills using the software  if handling some of the more advanced features are a little over your head.

So don’t be shy, hop over to youtube and get your brain juices on.

And don’t forget to comment below your thoughts and questions on the new PixScan from Silhouette.

Disclaimer: I do not work for Silhouette America, I just love their products and I want to share my wonderful experiences with the world. I have owned a PixScan for about 3 years now and have used it a few times but I haven’t taken advantage of the full capabilities of it which I am really looking forward to doing very soon!